- Product Listings
- Nail Polishes
- Sally Hansen Salon Effects Nail Polish
Sally Hansen Salon Effects Nail Polish
Hot
November 07, 2012
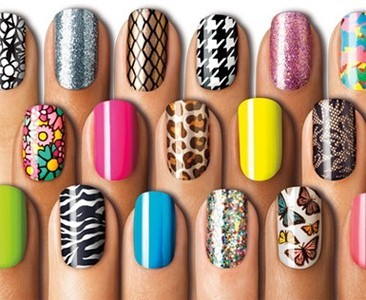
Sally Hansen brings your nails to life with her nail care colors known as Salon Effects. Get the rockstar look and feel good.

Photos
User reviews
sally Hansen nail wraps
(Updated: July 03, 2015)
Overall rating
4.7
Price
4.0
Quality
5.0
Effectiveness
5.0
These made me feel so special! Hehe such a great idea! I bought the flower power ones and it was so cute!! I will definitely buy it again and I was surprised on how long they lasted. Considering trying them with a gel base and top coat to prolong the life but not sure if that'll work.
Took one or two nails to get the hang of it but it was very easy to apply.
Took one or two nails to get the hang of it but it was very easy to apply.
M
melissa
Top 50 Reviewer
Sally Hansen Wraps
(Updated: July 03, 2015)
Overall rating
4.7
Price
4.0
Quality
5.0
Effectiveness
5.0
I have an animal print set that look stunning! I wouldnt wear them on all nails though, I would prefer an accent nail.
AM
Azraa Mohamed
Sally Hansen Nail Wraps
(Updated: July 03, 2015)
Overall rating
4.3
Price
4.0
Quality
4.0
Effectiveness
5.0
One of my favourite nail wraps that I have tried, only wish that they were more freely available and a little cheaper
MK
Megan Kelly Botha
Top 50 Reviewer
Overall rating
4.7
Price
5.0
Quality
4.0
Effectiveness
5.0
I love these stickers. They perfect for when nails need a cute design for a specific theme or party. They come in all different styles for every occasion. My favourite is the new Glitter ones. They easy to use and last long enough, up to 3 weeks :)
P
Priya
#1 Reviewer
Overall rating
5.0
Price
5.0
Quality
5.0
Effectiveness
5.0
In the beauty world of products, I think there is nothing that is more fun and as expressive as nail polish. You can have so much fun with your nails and go all out expressing your mood or personality with them. I have quite a big collection of nail polishes, over 50 colours, and that pales in comparison with the nail polishes I have used and given away. So it's safe to say I have tried out many different nail polishes and I always get excited trying out a new nail product. When Beauty Bulletin sent me Sally Hansen's Salon Effect nail polish strips I was delighted because I have been eyeing these in stores for many months now.
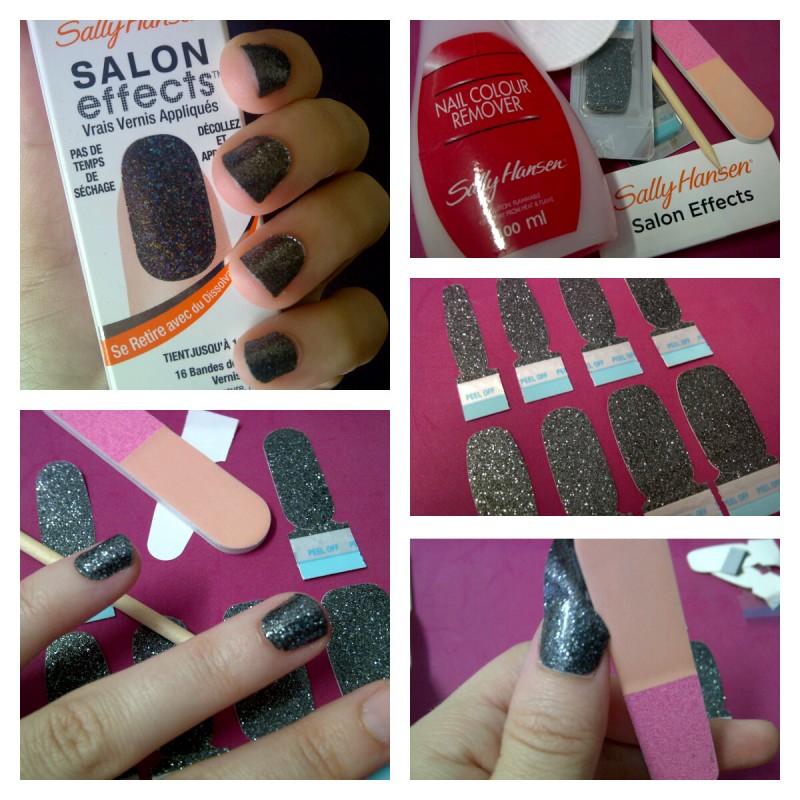
These nail strips are so easy to apply and go on smoothly without any bubbling. With a couple of other nail appliques I have tries, I had trouble placing them on my nails and many of them required me to cut them to size before applying them to my nails - it was such a painful process. Sally Hansen's nail appliques are made with real nail polish, so when I apply it I use the sharp edge of the wooden cuticle stick to remove the excess around my cuticles.
The length of the nail strip is more than enough to use on 2 nails so I was able to use 5 strips to do a complete manicure. This means that I will get about 2-3 manicures out of a box of 16 strips. For R80 this is incredible value for money. Once applied on your nails the nail polish hardens up and is surprisingly tough to damage. I've had them on my nails for 3 days now without any sign of them chipping or separating from my nail. But that is expected from Sally Hansen products.
The steps:
- Gently push cuticles back with the wooden stick provided
Shape and buff nails with the nail block provided in the pack.
- Use some nail polish remover to ensure that nails are clear of any oily traces - this ensures the nail strips adhere well to the nail bed (The Sally Hansen nail polish remover that I use has a wonderful sugary, sweet smell that I love).
- Peel open a nail strip and place the sticky side down on a nail.
- Smooth it with your thumb and ensure the applique is sticking securely right up until the tips of your nails.
- Use the soft side of the file to remove the excess...
- Use the excess on another nail
Overall I am incredibly impressed with these nail strips and will definitely be buying a few more to keep around for when I only have a few minutes to get a manicured looked.
C
Charlene
Top 50 Reviewer
I love these!!!
(Updated: July 03, 2015)
Overall rating
4.7
Price
4.0
Quality
5.0
Effectiveness
5.0
I love these!!! they last over 10 days which means... no worry for chips and recolour. they strong and super cute!
P
Priya
#1 Reviewer
For salon perfection
(Updated: July 03, 2015)
Overall rating
4.7
Price
4.0
Quality
5.0
Effectiveness
5.0
For salon perfection, I would really recommend these as they are so easy to apply once you have tried it once or twice. Plus there is no mess, no fuss with having to wait for the polish to dry. Comes in a variety of designs and does not chip or peel easily.
K
K@t
Top 50 Reviewer
easy to use
(Updated: July 03, 2015)
Overall rating
5.0
Price
5.0
Quality
5.0
Effectiveness
5.0
I cannot emphasize enough how easy these are to use! There is nothing better than not having to wait for nail polish to dry.
Another great thing is the strips lasted 10 days on my nails. That is longer than regular polishes.
I love the original patterns that you can wear. I got to try out the rainbow leopard design. I got tons of attention and nice comments. The only thing I dislike was the lines across the strips from printing the pattern on. but you only notice it up close.
I have tried Incoco's nail wraps and they were a lot thicker than Sally Hansen's ones but this caused more cracking as your nail bends.
Overall I love the idea of nail strips/wraps and I would definitely recommend the Sally Hansen brand.
C
Claire
Top 100 Reviewer
Overall rating
4.7
Price
4.0
Quality
5.0
Effectiveness
5.0
Love this. Saw it at clicks and just so happens that they were promoting them so I could see exactly how it was done and what the end result was. The pink with the skulls on is gorgeous and if you felt your nails without looking you would not even know they were on your nails. I would use a top coat over this because after all it is a nail wrap so any sharp things that you might touch could pull it off or tear it but otherwise loving it
CT
Chantelle Thompson
Top 500 Reviewer
(Updated: November 09, 2012)
Overall rating
3.0
Price
3.0
Quality
3.0
Effectiveness
3.0
If you have a hand fetish then welcome to your dream zone. Forever impressing women with top of the range nail products, Sally Hansen is one of the most popular nail brands available. This one in particular offers women a range of designs for nails. Every day women can now get the celebrity look when they purchase the Sally Hansen Salon Effects. This particular brand comes in a range of colorful nail polish strips. The three simple steps are as follows:
1.Peel nail polish strip from paper
2.Break silver tab from strip
3.Apply best fitting strip to your nail
4.Shape your nail to smooth excess strip over nail, file away excess strip with nail file provided
Ladies, as with all Sally Hansen products, this brand offers quality nail art. Its fun and sassy, perfect for that party you planning or to match with your favorite heels. Sally Hansen has managed to keep her products up to date with the latest trends. This is one of the many reasons she is an icon and favored among the woman community!
If you haven’t already tried a Sally Hansen nail product, then my recommendation is that you do try any one of her products as they are all good. Sally Hansen Salon Effects Nail Polish is perfect for a younger genre of ladies and perfect for that night out or a lovely day at the beach. Be sure to browse all the various nail effects as there are plenty to choose from and you don’t want to miss out!
Be your own nail technician and save time and money. Get the professional look without having to splash out. Sally Hansen Salon Effects Nail is the new nail look for the season!
S
Sheena
Top 100 Reviewer
five out five
(Updated: July 03, 2015)
Overall rating
5.0
Price
5.0
Quality
5.0
Effectiveness
5.0
A friend at work told me about these nail decals and I just had to try them. I’m not really sure what I was expecting, but I was totally blown away, these things are amazing! I found these at Clicks for just under R100.
One thing to bear in mind is that your nails need to be slightly long before you apply these (not a whole lot but just enough for you to fold the strip under a bit), so just a little bit of nail peeking above your fingertips will suffice.
Inside the box are the strips in a sealed little package, a mini file and a cuticle stick. There are 16 strips so basically one box = one use. It Also seems that once the little package containing the strips has been opened, any strips that are not used will dry out (I tried to cheat a second application by trimming up some of the remaining six into ten only to find there was no stickiness left to them).
The application was flawless, you just select the best sized strip, peel, pull it over your nail (as if you’re trying to stretch it) and tuck it under, then use the cuticle stick and file to remove any excess. It seemed a little tricky at first and I really thought I would screw up, but it truly was foolproof!
And here is the finished product! My nails looked so amazingly professional, I couldn’t stop staring at them! A word of warning: prepare to be inundated with compliments as everyone from colleagues to cashiers are going to question you non-stop about your gorgeous nails and the achievement thereof!
And here is the real selling point for me, they lasted just over TWO WEEKS! No chipping, fading, wearing etc. Unfortunately, at around day ten or so I ill-advisedly decided to add a clear top coat to protect them and try make them last even longer, but the top coat itself started wearing off and peeling and as it did, started taking the decals with. So I definitely don’t advise that you put anything on top of them, they don’t need it.
My nails are also usually incredibly brittle and I sometimes find that nail polish can make them even more brittle. However I didn’t suffer any breakage at all whilst I had these decals on my nails. I don’t know if that’s coincidence or not, but the past week I have had regular nail polish on and my nails have started breaking once again.
So all in all, a five out five, or rather a ten out of ten (ten perfect leopard printy fingers that is)!!!
R
Rachel
Top 1000 Reviewer